Introduction
Did you know the average professional groomer goes through 6–10 clipper blades a year and at least two pairs of shears? I didn’t believe it until I looked at my own “retirement drawer” of tools that died way too young. Honestly, when I started grooming, I had no clue that half the problems I was having-lines in coats, clippers getting hot, blades dulling after a few grooms-were because I was using the wrong tools or just… using them wrong. We’ve all been there.
The thing is, choosing the right dog grooming tools for professionals is one of the biggest leveling-up moments you’ll ever have in this career. High-quality tools actually save time, reduce soreness, make finish work cleaner, and-my favorite-keep clients from nitpicking because the groom suddenly looks noticeably better. In this guide, I’m breaking down the exact professional grooming tools that matter, why they matter, and how to build the perfect kit at any budget. And trust me, the right setup can completely change your day.
Essential Clipper Types Every Professional Groomer Needs
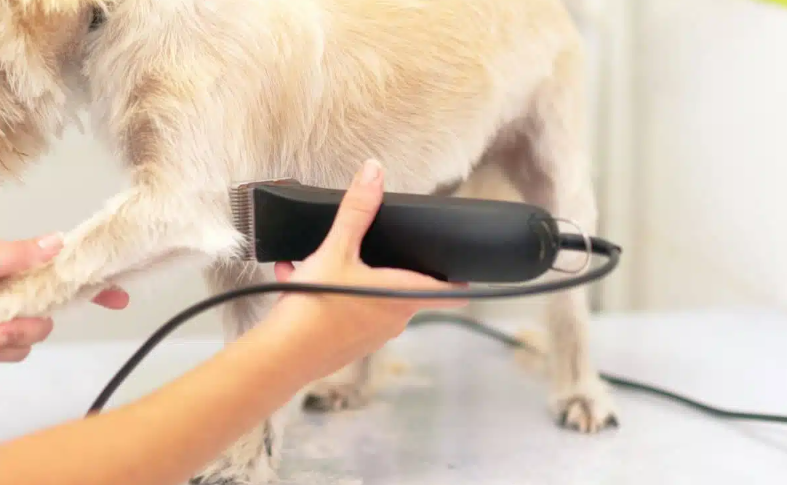
I learned pretty early on that not all clippers are created equal. My first year grooming, I bought a cheap corded clipper because someone on a message board said it was “amazing.” Yeah… amazing at stalling out halfway through a pom’s dense coat. I’d be mid-groom, sweating, whispering prayers like the clipper could hear me. Spoiler: it couldn’t.
The two main types of clippers you need to understand as a professional groomer are corded and cordless. Corded clippers have more consistent torque, meaning that the motor pushes through heavier, dirtier, curlier, or just plain stubborn coats without bogging down. Torque is honestly more important than SPM (strokes per minute). People get caught up in thinking “faster is better,” but if the clipper doesn’t have enough power, all that speed means nothing on a doodle with two years of backyard matting.
Cordless clippers, on the other hand, are a lifesaver for faces, sanitary trims, puppies, or anything with lots of movement. I swear, every pro groomer I know has been hit in the face by a cord at least once while trying to maneuver it around a doggie butt. A cordless solves that whole circus.
But cordless clippers come with downsides: batteries degrade, runtime varies, and many cordless options don’t have the raw power needed for thick or dirty coats. I’ve had cordless clippers that worked beautifully for six months and then slowly got weaker until I was practically carving through fluff like I was using a dull butter knife.
My biggest tip? Have at least two clippers:
- A heavy-duty corded workhorse
- A lightweight cordless for details and movement
And for the love of Pete, rotate your batteries. I used to let one sit fully charged for weeks, and then it died permanently. Apparently that’s bad. Who knew? Sometimes grooming is a blend of tool knowledge, chaos management, and prayer.
The last thing I’ll say here: keep your clipper vents clean. You’d be amazed how much coat can get sucked into those little grills. Once, I thought my clipper motor was dying, but it was just choking on a month’s worth of fluff. Embarrassing, but hey, we learn.
Understanding Clipper Blades and Comb Attachments
Blades were one of the most confusing things for me when I started grooming. I remember someone saying, “Grab a #7F,” and I just nodded like I understood while internally panicking. Blade numbers don’t feel intuitive at first. A #10 cuts shorter than a 4? A 7F is not the same as a skip tooth? Why is this so unnecessarily complicated?!
Here’s the cheat sheet I wish someone had given me:
- The higher the blade number, the shorter it cuts.
- F blades (finish) are for smooth, clean work.
- Skip tooth blades grab more coat and are great for rough-ins, but they can be dangerous in inexperienced hands.
- A #10 blade is your workhorse for sanitary areas, pads, and many comb attachments.
Ceramic vs steel is another fun rabbit hole. Ceramic blades stay cooler longer, which sounds great-until you drop one and the tooth explodes like glass. Ask me how I know. Steel blades get hotter, but they’re durable and tend to sharpen more consistently.
Then we get into comb attachments. Attachment combs pair best with a #30 or #10 blade, depending on the brand. A #40 can work, but it’s risky and honestly unnecessary unless you’re dealing with specialty grooming.
One of the biggest mistakes I made early on was using combs on dirty, damp, or under-prepped coats. Combs hate that. They snag, they leave tracks, they pull hair… and then you start resenting the comb instead of realizing the prep work is what’s wrong. Always brush, dry, fluff, then comb through before running a comb attachment. It makes all the difference.
Maintenance tip: oil your blades every 15–20 minutes. I used to think people were exaggerating until I burned out a blade hinge and had the entire kennel smelling like burning metal.
Shears: Choosing the Right Types for Precision Work
If clippers are the engine of grooming, shears are the paintbrush. I used to think all shears were basically the same until I tried a truly high-quality pair for the first time. It was like the difference between cutting paper with kindergarten safety scissors versus a brand-new pair of razor-sharp craft shears.
You’ll need several types of shears as a professional groomer:
- Straight shears (everyday trimming and body work)
- Curved shears (faces, round heads, angulation, legs)
- Thinning shears (softening lines, blending transitions)
- Chunkers (removing bulk without harsh lines)
Ergonomics matter more than groomers realize. If a shear handle forces your wrist to bend weirdly, you’ll feel it. Groomer wrists take a beating. I used to wake up with numb fingers before I switched to offset handles. Haven’t had that pain since.
Length matters too:
- 7” shears = smaller dogs, detail work
- 8” and 8.5” = all-around use
- 9”+ = big dogs, long legs, doodle faces
Steel quality affects how long they stay sharp. Japanese steel like 440C or VG10 is top-tier. Cheaper steel bends more easily and dulls faster.
Store your shears properly. I once tossed mine in a drawer (rookie mistake), and the tips chipped from hitting other tools. Crying was almost involved. Now I baby them like they’re houseplants.
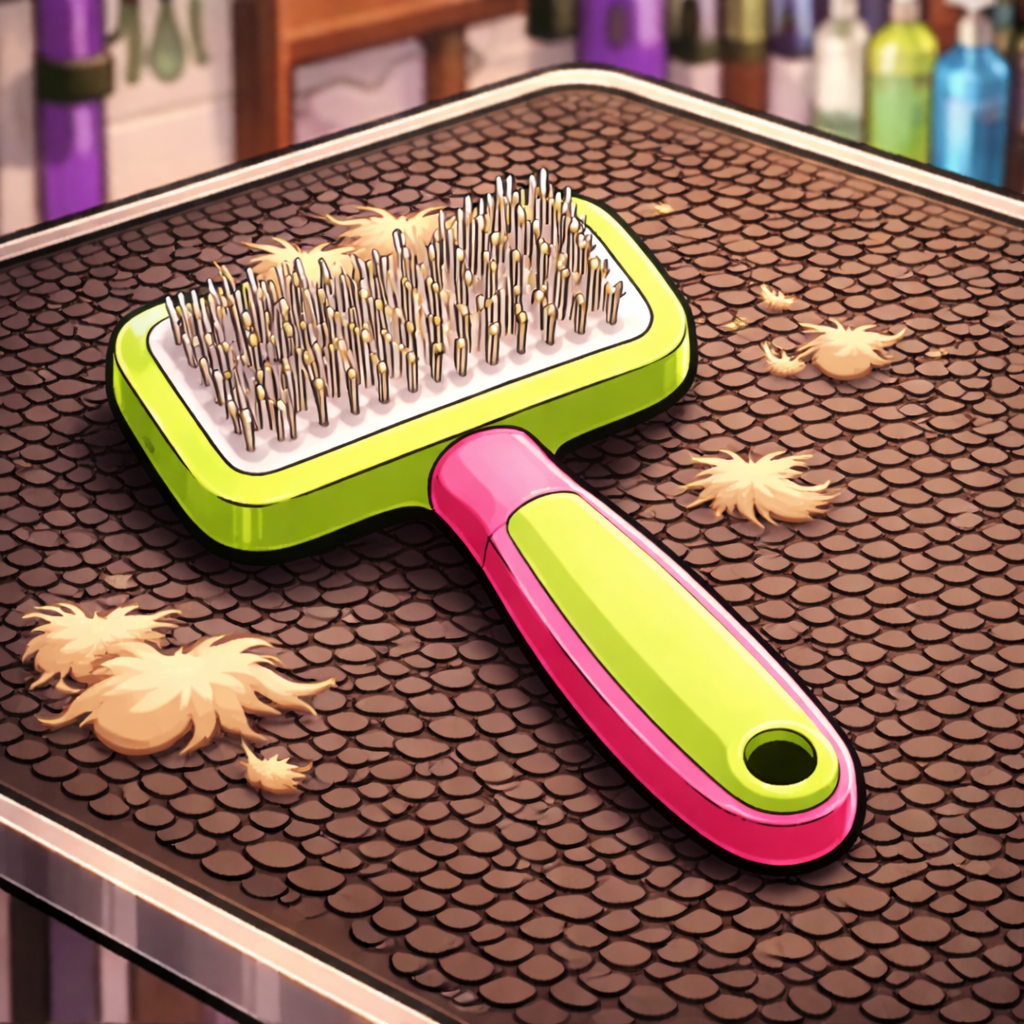
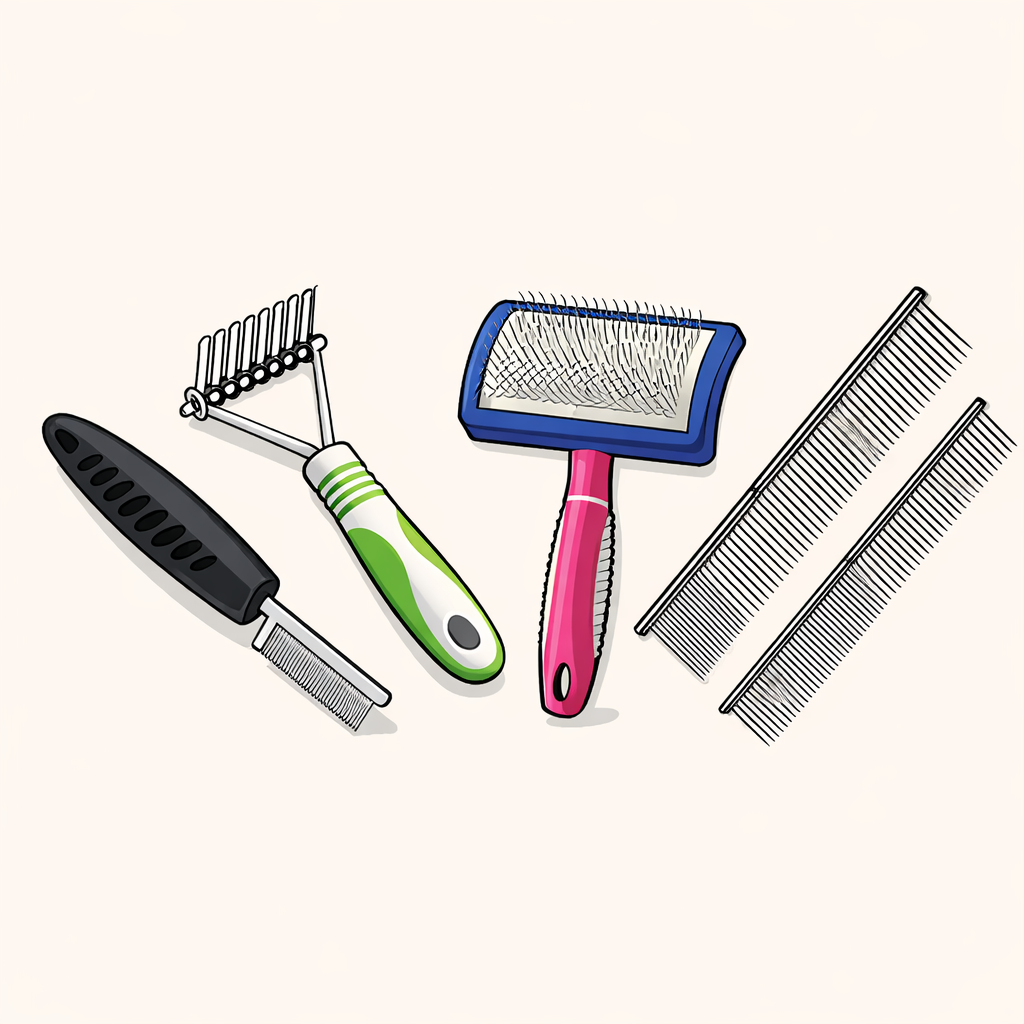
Dematting, Deshedding, and Coat Preparation Tools
For dematting, my go-to tools are:
- A sturdy dematting rake
- A flexible slicker brush
- A fine-tooth metal comb
The trick with dematting isn’t brute force. It’s patience and the right angle. You want to slice THROUGH the mat, not yank it. Yanking ruins trust AND coat integrity. Break mats apart gently with the rake and then fluff them out with the slicker.
Deshedding tools are for double-coat breeds like huskies, shepherds, and golden retrievers. A good rake and a high-velocity dryer do most of the heavy lifting. Please don’t use a Furminator on every coat. It’s fine for some dogs, but it can damage others. Think of it like sandpaper: helpful when you know how to use it, but disastrous if you don’t.
Slicker brushes are the MVPs of grooming. A flexible-head slicker changed my life. My finish work got smoother instantly. I didn’t realize how stiff my old brushes were until I got a good one and suddenly the coat lifted like magic.
Prep determines everything. If the prep is good, the clip is smooth. If the prep is bad, you’ll be fighting with blades, comb attachments, shears and brushes for the entire groom.
Grooming Dryers and Their Role in Finish Quality
I used to underestimate dryers, thinking a dryer was just… a dryer. Nope. If baths are half the groom, dryers are the other half. A powerful high-velocity dryer (HV dryer) blows out loose coat, straightens curls, fluffs hair, and preps the coat for a true professional finish. Once I upgraded to a better dryer, I cut my grooming time by almost 30%.
HV dryers are perfect for:
- Deshedding (seriously, they are magic on huskies)
- Fluff drying curly coats
- Removing water fast
- Getting coats straight enough for clean scissoring
You want high CFM (airflow) and good AMP (power). Don’t fall for the super cheap dryers that look fancy. I had one melt the hose while I was drying a Wooly Malamute. The dryer went into retirement that day.
Stand dryers are great too. I use mine for finishing poodles, bichons, and doodles. They free your hands and keep the air gentle enough for precision work. The only downside is some dogs HATE standing still while something blows at them forever. But once they get used to it, it’s a game changer.
Cleaning filters is so important. A clogged filter makes the dryer weaker and overheats the motor. I used to think my dryer was dying, but it was just suffocating in dust and undercoat. Kind of like me during husky season.
Noise matters too. Some dryers are loud enough to make you rethink your career choices. If you work mobile or with timid dogs, choose a quieter unit. If you value your hearing, wear noise cancelling headphones.
Must-Have Grooming Table Features for Professionals
Your grooming table is the foundation of your whole setup. I groomed on a foldable table for way too long, and my back still hates me for it. Once I switched to an electric grooming table, everything changed. Being able to lower it for large dogs and raise it for detail work literally saved my shoulders.
Electric tables are pricey but worth every penny. Hydraulic tables are cheaper and still amazing, though they take more effort to pump up. For tall groomers, table height is everything. You shouldn’t be bending over or reaching upward constantly. Grooming shouldn’t be a workout… even though some days feel like CrossFit with fur.
You also want:
- A sturdy grooming arm
- A reliable grooming loop
- A non-slip mat
- Side tool trays or magnets for shears and brushes
Your body will thank you for a good table. So will the dogs.
Sanitation Supplies and Safety Tools Every Groomer Needs
Sanitation isn’t the fun part of grooming, but it’s one of the most important. Clients trust us with their pets, and clean tools prove we take that seriously. I use disinfectant sprays that are safe for grooming equipment and follow a strict routine after every dog. Clippers, blades, shears, tables, and brushes get cleaned constantly.
A good groomer also needs a first aid kit. Nails get clipped short sometimes. Dogs wiggle. It happens. I’ve had a few “oops” moments in my early days that made me rethink how fast I was trying to work.
I also keep:
- Grooming gloves for aggressive or anxious dogs
- Muzzles (used gently and responsibly)
- Extra grooming loops
- Styptic powder
- Ear cleaner
- Blood stopper gel
Cross-contamination is real. Clean tools stop that. Plus, clients notice when your tools look clean versus crusty. One time a client told me they left their last groomer because “their table looked dirty.” That’s all it took.
How to Build a Professional Grooming Tool Kit on Any Budget
You don’t need $3,000 worth of tools to get started. I hate seeing new groomers feel pressured into buying everything at once. Start where you are.
Starter kit ($300–$600):
- 1 corded clipper
- 3–4 blades (#10, #5F, #7F, #30)
- 1 basic slicker brush
- 1 straight shear
- 1 dematting rake
- 1 cheap HV dryer knockoff
- Nail clippers + styptic
Intermediate kit ($800–$1,500):
- Cordless clipper added
- Higher-quality shears
- HV dryer
- Grooming table upgrade
- More blades and comb attachments
Pro kit ($2,500+):
- Electric table
- High-end shears (multiple sets)
- Top-tier HV dryer
- Full blade set + backups
- Premium combs, rakes, and brushes
Upgrade slowly. You’ll feel what you need most as you go.
Maintenance Habits That Extend the Life of Your Grooming Tools
Grooming tools aren’t cheap, so making them last is huge. I used to toss my shears into drawers, leave blades un-oiled, forget to clean brush pads… and then wonder why things kept breaking. Once I established a routine, everything lasted longer.
My daily routine now:
- Oil blades throughout the day
- Clean shears after every groom
- Brush out slickers
- Check table mats
- Empty HV dryer filters
- Sanitize entire station
Weekly:
- Deep clean tools
- Sharpen dull blades
- Inspect clipper cords and batteries
- Tighten shear tension
Monthly:
- Replace worn loops
- Deep clean dryer hoses
- Reorganize tools
A well-maintained tool is a happy tool. And happy tools mean faster, cleaner, smoother grooms.
Conclusion
Choosing the right dog grooming tools for professionals makes grooming easier, safer, and way more enjoyable. The right tools can literally transform your day. Whether you’re just starting out or upgrading your entire setup, remember to build your kit slowly, invest in quality where it counts, and maintain your tools like the little coworkers they are. And seriously—if you’ve got a tool you swear by, share it. Groomers learn best from each other, and your favorite find might just become someone else’s new must-have.